Installing Software from Compressed Archives: .tar.gza.
Linux software applications in the form of source code are available at different sites on the Internet. You can download any of this software and install it on your system. Recent releases are often available in the form of compressed archive files. Applications will always be downloadable as compressed archives if they don’t have an RPM version. This is particularly true for the recent versions of GNOME or KDE packages. RPM packages are only intermittently generated.
Decompressing and Extracting Software in One Step:-
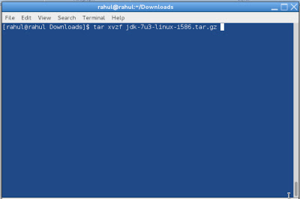
Though you can decompress and extract software in separate operations, you will find that the more common approach is to perform both actions with a single command. The tar utility provides decompression options you can use to have tar first decompress a file for you, invoking the specified decompression utility. The z option automatically invokes gunzip to unpack a .gz file, and the j option unpacks a .bz2 file. Use the Z option for .Z files, For example, to combine the decompressing and unpacking operation for a .tar.gz file into one tar command, insert a z option into the option list, xzvf (see the later section “Extracting Software” for a discussion of these options). The next example shows how you can combine decompression and extraction in one step:

Fig. decompression and extraction command
# tar xvzf htdig-3.1.6.tar.gz
For a -compressed archive, you use the j option instead of the z option.
# tar xvjf htdig-3.1.6.tar.bz2
Decompressing Software Separately
Many software packages under development or designed for cross-platform implementation may not be in an RPM format. Instead, they may be archived and compressed. The filenames for these files end with the extension .tar.gz, .tar.bz2, or .tar.Z. The different extensions indicate different decompression methods using different commands: gunzip for .gz, bunzip2 for .bz2, and decompress for .Z. In fact, most software with a RPM format also has a corresponding .tar.gz format. After you download such a package, you must first decompress it and then unpack it with the tar command. The compressed archives can hold either source code that you need to compile or, as in the case with Java packages, binaries that are ready to run. A compressed archive is an archive file created with tar and then compressed with a compression tool like gzip. To install such a file, you must first decompress it with a decompression utility like gunzip and then use tar to extract the files and directories making up the software package. Instead of the gunzip utility, you could also use gzip -d. The next example decompresses the jdk-7u3-linux-i586.tar.gz file, replacing it with a decompressed version called jdk-7u3-linux-i586.tar:
You can download compressed archives from many different sites, including those mentioned previously. Downloads can be accomplished with FTP clients such as NcFTP and gFTP, or with any web browser. Once downloaded, any file that ends with .Z, .bz2, .zip, or .gz is a compressed file that must be decompressed. For files ending with .bz2, you use the bunzip2 command.
Files ending with .bin are self-extracting archives. Run the bin file as if it were a command. You may have to use chmod to make it executable. The j2sdk software package is currently distributed as a self-extracting bin file.
# j2sdk-1.4.2-FCS-linux-i386.tar.bin
Selecting an Install Directory
Before you unpack the archive, move it to the directory where you want it. Source code packages are often placed in a directory like /usr/local/src, and binary packages go in designated directories. When source code files are unpacked, they generate their own subdirectories from which you can compile and install the software. Once the package is installed, you can delete this directory, keeping the original source code package file (.tar.gz). Packages that hold binary programs ready to run, like Java, are meant to be extracted in certain directories. Usually, this is the /usr/local directory. Most archives, when they unpack, create a subdirectory named with the application name and its release, placing all those files or directories making up the software package into that subdirectory. In certain cases, the software package that contains precompiled binaries is designed to unpack directly into the system subdirectory where it will be used. For example, it is recommended that j2sdk-1.4.2-FCS-linux-i386.tar be unpacked in the /usr/local directory, where it will create a subdirectory called j2sdk-1.4.2. The /usr/local/j2sdk-1.4.2/bin directory holds the Java binary programs.
Extracting Software
First, use tar with the t option to check the contents of the archive. If the first entry is a directory, then when you extract the archive, that directory is created and the extracted files are placed in it. If the first entry is not a directory, you should first create one and then copy the archive file into it. Then extract the archive within that directory. If no directory exists as the first entry, files are extracted to the current directory. You must create a directory yourself to hold these files.
# tar tvf jdk-7u3-linux-i586.tar
Now you are ready to extract the files from the tar archive. You use tar with the x option to extract files, the v option to display the pathnames of files as they are extracted, and the f option, followed by the name of the archive file:
# tar xvf jdk-7u3-linux-i586.tar
You can also decompress and extract in one step using the -z option for gz files and –j for bz2 files.
The extraction process creates a subdirectory consisting of the name and release of the software. In the preceding example, the extraction created a subdirectory called jdk-7u3-linux-i586
You can change to this subdirectory and examine its files, such as the readme and INSTALL files.
# cd jdk-7u3-linux-i586
Installation of your software may differ for each package. Instructions are usually provided along with an installation program. Be sure to consult the readme and INSTALL files, if included.
# ./configure
Or
# ./filename..bin
Etc…