Creating a new Disk partition and formatting it in Linux
Disk utility can also be used to create new partitions and prepare them for use. Once a partition has been created, it must be formatted with a file system before it can be used. The standard file system used in Red Hat Enterprise Linux is ext4, the Fourth Extended File system.
In order to use the file system, we need to associate it with a mount point, and empty directory on a file system that is already available. Then the contents of that file system can be browsed as if they are the contents of the mount point directory. This is called as mounting the file system on the mount point.
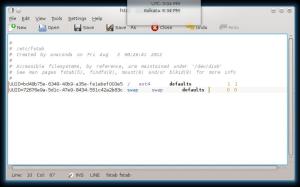
A file which only root can edit, /etc/fstab, list what partitions should have their file systems mounted on what mount points with which options, one partition per line, A typical line may look like this:
/dev/sda6 /data ext4 defaults 1 2
This indicates that the ext4 file system on the /dev/sda6 partition should be mounted on the directory /data automatically using default options at boot time, and it should be backed up and checked for errors normally.
Once this is set, root can run mount /data to mount the file system above and umount /data to un-mount it.

/etc/fstab
High- level steps for creating persistent storage
Log into GNOME as a regular user.
Use Disk Utility to create a partition. Enter the root password when prompted by the Authentication is required to create a partition dialog.
Format the file system and assign it a label.
Test the file system by mounting it with Disk Utility (It will be mounted on the directory
/media/your-label.)Open a shell prompt with Application —> System Tools —> Terminal.
At the shell prompt, type
su– to switch to a root shell.As root, type the shell command
mkdir /datato make an empty directory,/data, for the file system.Use gedit to add a line to
/etc/fstabwhich will mount the ext4 file system in your new partition on your mount point (/data in this example), using default options as in the example above. Save/etc/fstab.As root, run
umount /media/your-label, then mount /data. verify that your partition is mounted on /data by highlighting the partition in Disk Utility.Reboot to confirm that the file system mounts automatically on the desired mount point.